
How To Make Ice Cream Balls With Spoon
Start your ice cream ball-making session by gathering all necessary materials. Here’s what you’ll need:
- A scoop or spoon
- Your favorite flavor of ice cream
- Softened toppings (such as chocolate chips, sprinkles, or crushed cookies)
- A plate or container to hold the finished product
- A freezer for storage if needed
- Parchment paper or wax paper to line the storage container (optional)
It’s important to have everything set up before starting the process so that you can work efficiently and avoid melting your ice cream.
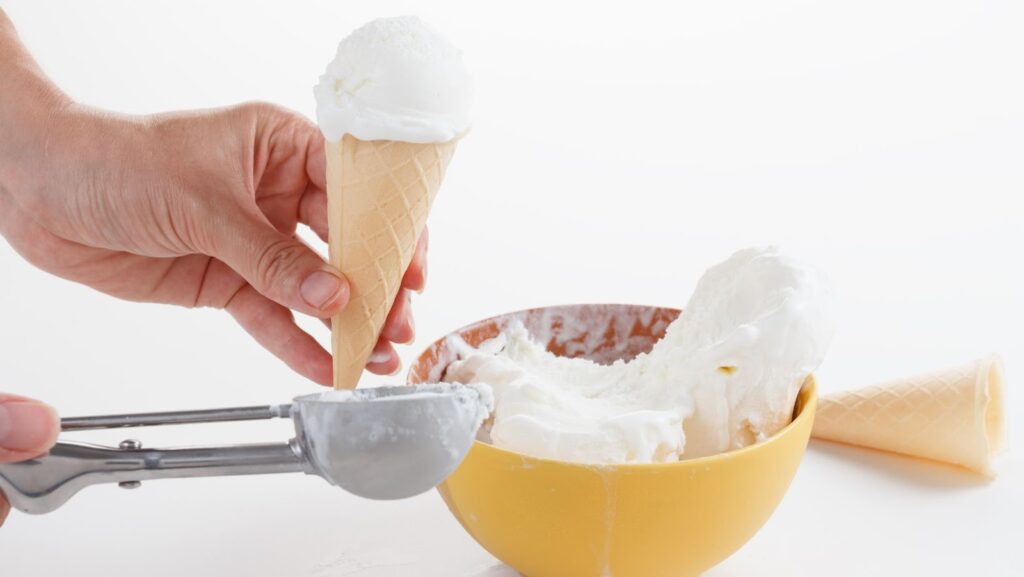
Once you have gathered the essential supplies, it’s time to proceed to make your ice cream balls with a spoon. Simply scoop out the desired amount of ice cream with the spoon and use another spoon or a knife to round off the edges, creating a perfect ball shape. Then, roll it in any chosen toppings until they are evenly distributed across its surface.
To elevate your finished product presentation even further, line your storage container with parchment paper or wax paper before placing the completed balls inside. This will help prevent them from sticking together and make for easy removal when you’re ready to serve.
By following these simple steps and using suitable tools, you can create beautifully crafted ice cream balls that are sure to impress anyone who gets a taste!
Get your ice cream ready, because it’s about to get scooped up in a ball-tastic way!

Preparing the Ice Cream
To prepare the ice cream for optimal scooping, soften it first. With this section on preparing the ice cream with the sub-sections of softening the ice cream and choosing a spoon, you’ll find tips to make the process easier and create picture-perfect balls of ice cream.
Softening the Ice Cream
The next step in the ice cream preparation process involves making the frozen treat more supple and easy to work with. This can be accomplished by ‘Tempering the Ice Cream’. To make the ice cream easier to scoop or spread, follow these 5 steps:
- Remove the ice cream from the freezer
- Let it sit at room temperature for about 5 minutes
- While waiting, microwave a glass measuring cup of water for a minute until steaming hot
- Once heated, remove the water from the microwave and place it next to your frozen dessert
- Dunk your metal scooper or knife into the hot water – this will help reduce drag on your utensil when cutting through the solidified dessert.
It’s important to note that this process should be done quickly, as leaving out ice cream for an extended period will cause it to melt and refreeze, leading to an unpleasant texture.
It’s also worth mentioning that some ice cream experts recommend letting your chosen flavor soften slightly in the fridge (not at room temperature) before scooping for optimal consistency.
In history, people have been softening their desserts since ancient times. The Romans used snow and fruit juice while medieval masters produced ices using flowers and fruits. Ironically, chilled sweets were made fashionable by royal cooks who wanted to replicate an Indian sorbet-like dish – drinks mixed with sugar were brought to England in the mid-seventeenth century and served to Charles II’s courtiers as a luxurious novelty during their summer balls.
Your spoon choice may seem trivial, but trust me, the wrong one can lead to a disaster worse than brain freeze.
Choosing a Spoon
When selecting an appropriate utensil for ice cream consumption, there are a few factors to consider in order to achieve optimal satisfaction.
- Choose a spoon that is deep enough to hold a sizable amount of ice cream.
- Select a spoon made from sturdy material that can withstand the frozen consistency of ice cream.
- Opt for a spoon with a comfortable handle grip, as holding the utensil for extended periods can cause discomfort.
- If consuming ice cream from a container, select a long-handled spoon to avoid making a mess or getting your hands dirty in the process.
- Select either an oval-shaped or round-edged spoon to achieve smooth scoops and minimize dripping.
- If you are feeling adventurous, opt for flavored spoons such as peppermint or chocolate to add an extra dimension to your dessert experience.
It is worth noting that some individuals prefer using other utensils such as forks or even their hands when indulging in ice cream. However, these methods may prove less efficient at ensuring proper portions and cleanliness.
When approaching this selection process, it is essential to consider not only personal preference but also practicality and convenience.
One summer evening, while enjoying a scoop of mint chocolate chip ice cream with my family, my father shared with us his preferred method of selecting a spoon. He claimed that he always chooses spoons with thicker handles because it allows him to exert more force when scooping through harder portions of the frozen treat. This tiny detail had never occurred to me before but significantly impacted my future choices when selecting the perfect spoon for my ice cream enjoyment.
Get ready to channel your inner Michelangelo as you craft the perfect scoop – just don’t expect it to last as long as his David.
Making the Ice Cream Balls
To master the art of making perfect ice cream balls with just a spoon, you need to nail down the technique of scooping the ice cream just right. Once you have mastered this, shaping the ice cream ball is easy. In this section on making ice cream balls, we will explore these two sub-sections, so that you can make delicious and visually appealing ice cream balls with ease.
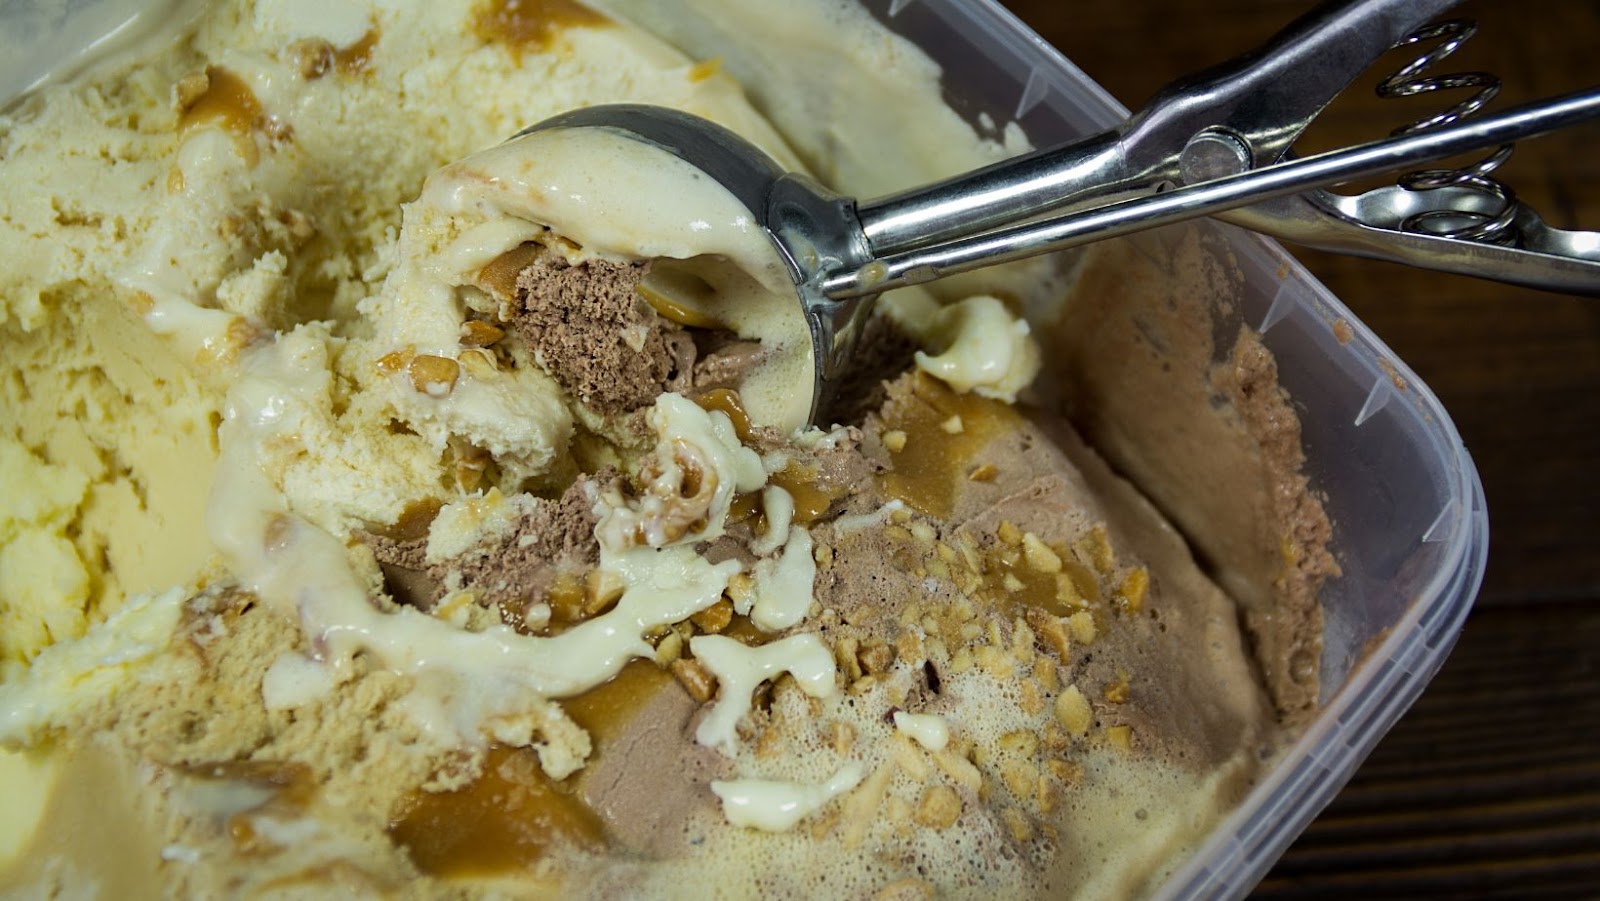
Scooping the Ice Cream
Assembling the Perfect Scoop of Ice cream
One of the most important steps in producing amazing ice cream cones is scooping the perfect ball. Here’s how to do it.
- Use a sturdy, ergonomic scoop with a comfortable handle grip.
- Scoop using a firm pressure that easily brings out the rounded shape.
- Rotate your wrist slightly as you remove the scoop from the tub and level off excess ice cream.
- Release the ball into your cone or dish with minimal handling to keep its shape intact.
In addition, remember to keep your ice cream in its optimal temperature range, so it is neither too soft or too firm for easy scooping.
Pro Tip: Dip your scoop in warm water every so often so that ice cream slides off effortlessly.
Who needs a personal trainer when you can sculpt the perfect booty with just a scoop of ice cream?
Shaping the Ice Cream Ball
Ice Cream Ball Formation
To shape the perfect ice cream balls, use a deft touch and the right tools. Here’s how:
- Use an ice cream scoop to measure the right amount of ice cream for each ball.
- Drop each scoop onto a cold surface like a baking sheet or tray.
- Using lightly dampened hands, round out each scoop into a ball shape.
- Place them uncovered in the freezer for at least an hour, until solid.
- Store them until needed in an airtight container.
For an added bonus, decorate your ice cream balls with colorful sprinkles or drizzled chocolate before freezing.
Pro Tip: Soften your favorite types of ice cream slightly before scooping them, for ease of shaping and uniform size.
Prepare to be amazed as we unveil our perfectly spherical and sinfully delicious ice cream balls.
Presenting the Ice Cream Balls
To present your delicious ice cream balls, follow these simple steps in making the perfect icy dessert. Using just a spoon, create perfectly rounded balls in no time, making sure that they are consistent in size before moving on to the fun part. In the upcoming sub-sections of adding toppings and placing the ice cream balls in a bowl, we will show you how to elevate your presentation game.
Adding Toppings
The process of enhancing the flavor and presentation of Ice Cream Balls is achieved by using a variety of delectable toppings that perfectly compliment its creamy texture. Consider the following points for an ultimate dessert experience:
- Select from a range of toppings including sprinkles, fudge, caramel, chocolate chips and fresh fruit to add a subtle sweetness or burst of flavor to your ice cream ball.
- Before adding toppings, ensure the ice cream ball is rolled in freeze-dried fruits or nuts for extra crunch and uniqueness.
- If serving multiple ice cream balls as part of a platter, arrange toppings thematically and strategically according to color palette, such as yellow banana chips paired with spicy cayenne powder to balance the sweetness.
- To take visual aesthetics up a notch, dust edible glitter over each ice cream ball.
To further elevate your dessert game, consider hosting an Ice Cream Ball Toppings Bar where guests can benefit from the variety of taste experiences.
Studies have shown that incorporating different textures within one dish can heighten sensory enjoyment (source: The Journal of Sensory Studies).
Don’t be a square, go round with your ice cream and place those balls in a bowl like a pro.
Placing Ice Cream Balls in a Bowl
For arranging ice cream balls in a dish, follow these three easy steps:
- Pick up the ice cream scoop and create smooth, round scoops of ice cream.
- Next, place these balls of ice cream side by side in a bowl or plate that can comfortably accommodate all the servings.
- Lastly, drizzle sweet and delicious toppings over the scoops once they are arranged correctly.
It is essential to ensure that individual flavours or types of ice cream balls do not mix while placing them in the dish. It is also recommended to serve chilled dishes for maximum effect.
Did you know that serving scoops of ice cream dates back to ancient Persia? They used to flavour it with sweet syrup called sharbat and served it as an exotic dessert in golden bowls during royal get-togethers!
Well, at least with all these melted ice cream balls, the cleaning crew won’t go hungry.

Cleaning Up
After preparing and enjoying your homemade ice cream balls, it’s time to tidy up. The cleanup process is an essential part of ensuring a hygienic and organized kitchen.
Start by clearing any remaining ice cream from the surface and utensils used for scooping. Rinse with warm water to remove any debris or excess sugar, then wash with soap and hot water to sterilize each tool. Dry them thoroughly before storing them away.
A helpful tip for avoiding a mess is wiping down counters while working, so spills don’t stick and harden over time.
Overall, creating a simple system for cleaning up after making ice cream balls will save you time and make the process smoother in the long run.
It is said that in the late 1800s, mechanical ice cream scoops were invented to allow servers to scoop firm ice cream more efficiently. However, using spoons has not gone out of fashion and remains a popular method among home cooks today.